Tenant administration
· 05/29/2025 ·
Tenants are organizations or entities that have subscribed Intel® Trust Authority. Tenants can subscribe to Intel Trust Authority directly through Intel, a Managed Service Partner (MSP), or a Reseller.
When a tenant subscribes to an MSP, they do not have direct access to the service. Instead, the MSP manages the tenant's users, API keys, and services. In contrast, when a tenant subscribes through a Reseller, they have full access to the service and are responsible for managing it, while the Reseller does not have access to the service itself.
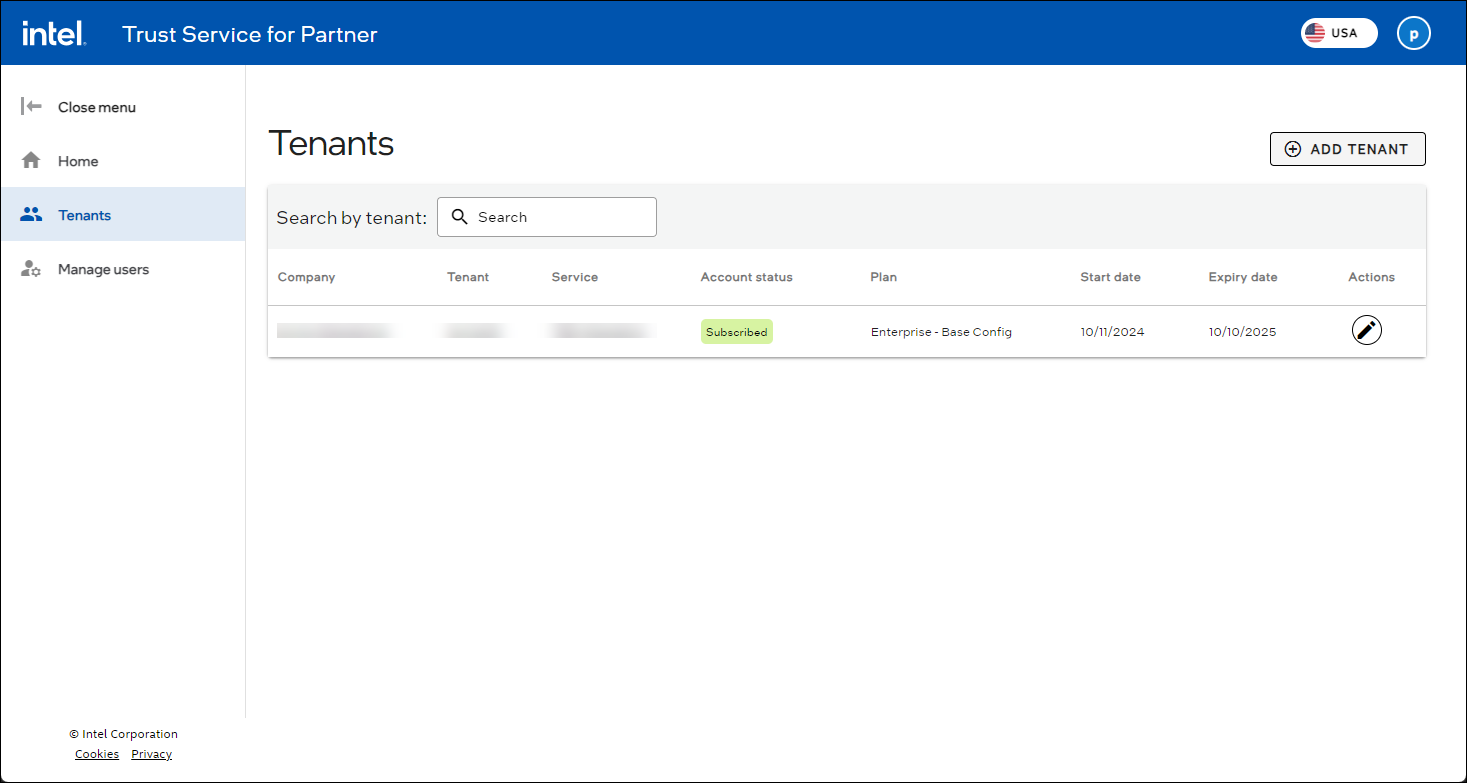
View tenants
Partners can view a tenant's details at any time.
Select Tenants from the menu.
The Tenants page displays the following information:
- Company
- Tenant
- Service
- Account status
- Plan
- Start date
- Expiry date
- Actions
From the Tenants page, a partner can omboard a tenant, or edit a tenant.
Onboard a tenant
Follow these steps to add a tenant to your Intel® Trust Services subscription. These instructions explain how to add a tenant to all Intel Trust Service subscription types. Once the process is complete, the tenant will receive an email invitation to register for Intel Trust Services.
Select Tenants.
The Tenants page is displayed.
On the Tenants page, select ADD TENANT.
The Add tenant page displays.
In the Tenant company profile section, complete the following fields:
- Company Name
- Company Address
- Tenant Name
In the Primary tenant admin profile section, enter the tenant's email address. The tenant's email address is used to log in to Intel Trust Authority.
Important
The primary tenant email cannot be changed. If the email is no longer valid, the entire tenant must be deleted and recreated. There is no method to migrate data from the old tenant to the new one, which means that all data, policies, API keys, users, and other related information will be permanently lost.
Under the Service info section, complete the following fields:
- Service - The type of service is limited to the service type the partner is subscribed to. For example, a partner subscribed to Intel Transparent Supply Chain can only select this service.
- Service Plan - Select the service plan for this tenant.
- Platform Lifecycle Assurance Quota (TSC/PLA only) - If the tenant is also subscribing to Intel® Platform Lifecycle Assurance (Intel PLA), enter the number of devices this tenant can track.
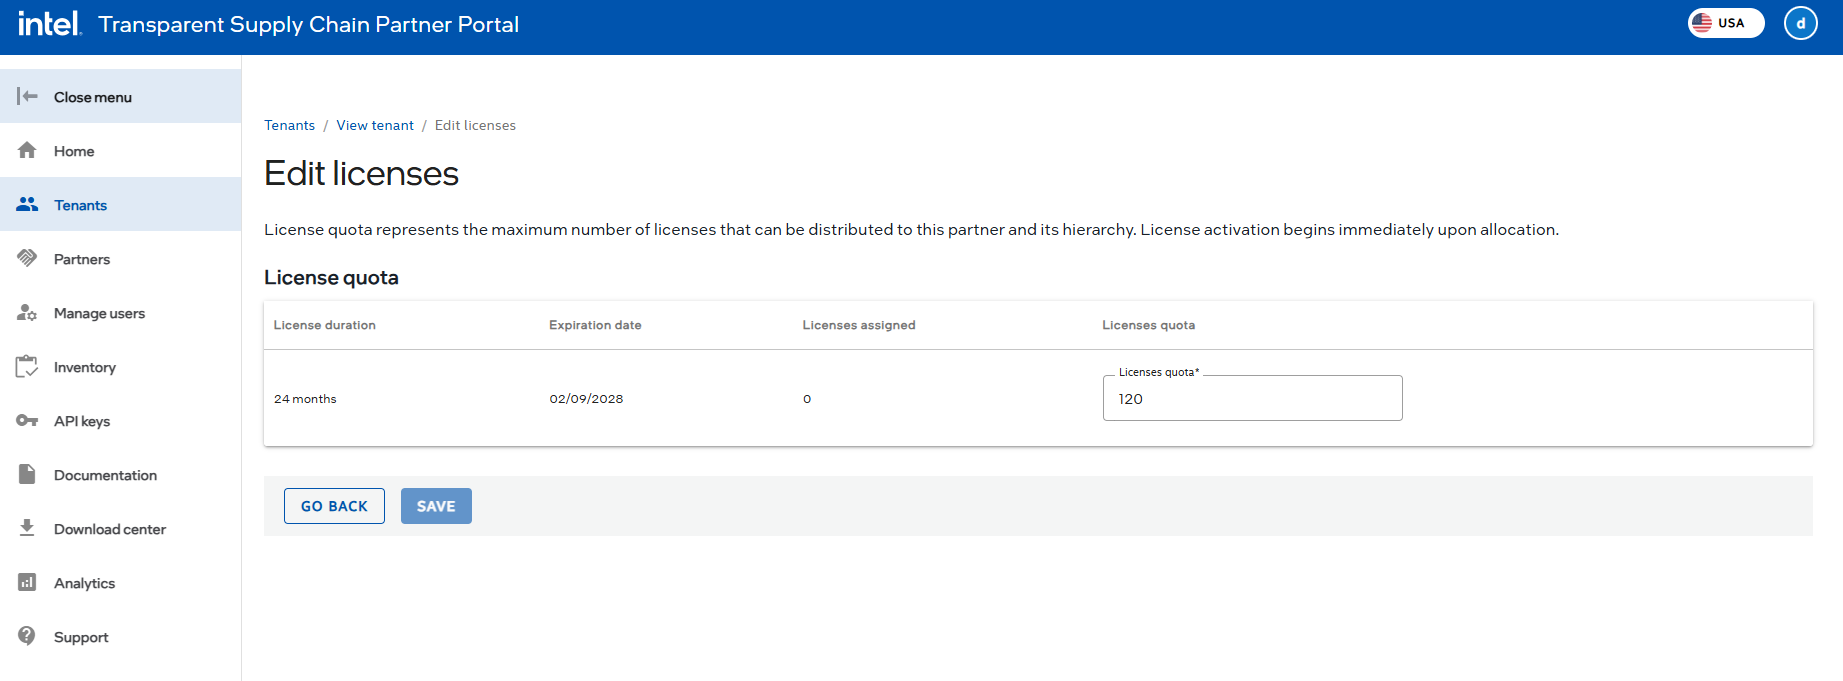
Under the License quota section, complete the following fields if the customer needs licenses; otherwise, skip this section.
- License duration - Choose the duration: 12, 24, or 36 months
- Expiration date - Select one of the available expiration dates. Multiple expiration dates are available if the partner has purchased licenses with the same duration on different dates.
- Assigned date - Select the assigned date when the partner's licenses were allocated.
- Licenses quota - Total number of licenses for the chosen duration, expiration date, and assigned date. This is a read-only field.
- Licenses available - Available licenses for the chosen duration, expiration date, and assigned date. The partner can allocate licenses to the tenant based on availability. This is a read-only field.
- Quantity - Number of licenses to allocate to the tenant. This value cannot exceed the available licenses.
Select SAVE & INVITE TENANT. The Tenants page shows the newly invited tenant listed with a status of Pending. The tenant will receive an email invitation with a link to register their Intel Trust Authority account.
Edit a tenant
A tenant's information can only be updated by a partner admin. Only the tenant's company profile information can be updated.
Select the Tenants menu item.
The Tenants page displays.
Select the Edit tenant
 icon of the tenant to be updated.
The Edit tenant page displays.
Under the Tenant company profile section, the following fields can be updated:
- Company Name
- Company Address
- Tenant Name
- Platform Integrity Quota (TSC/PLA only)
Choose from the following:
- Select SAVE. The Tenants page displays with updated tenant information.
- Select CANCEL. A confirmation pop-up appears. Choose from the following options:
- Select LEAVE PAGE to return to the Tenants page without saving your changes.
- Select STAY ON THIS PAGE to return to the Edit tenant page.
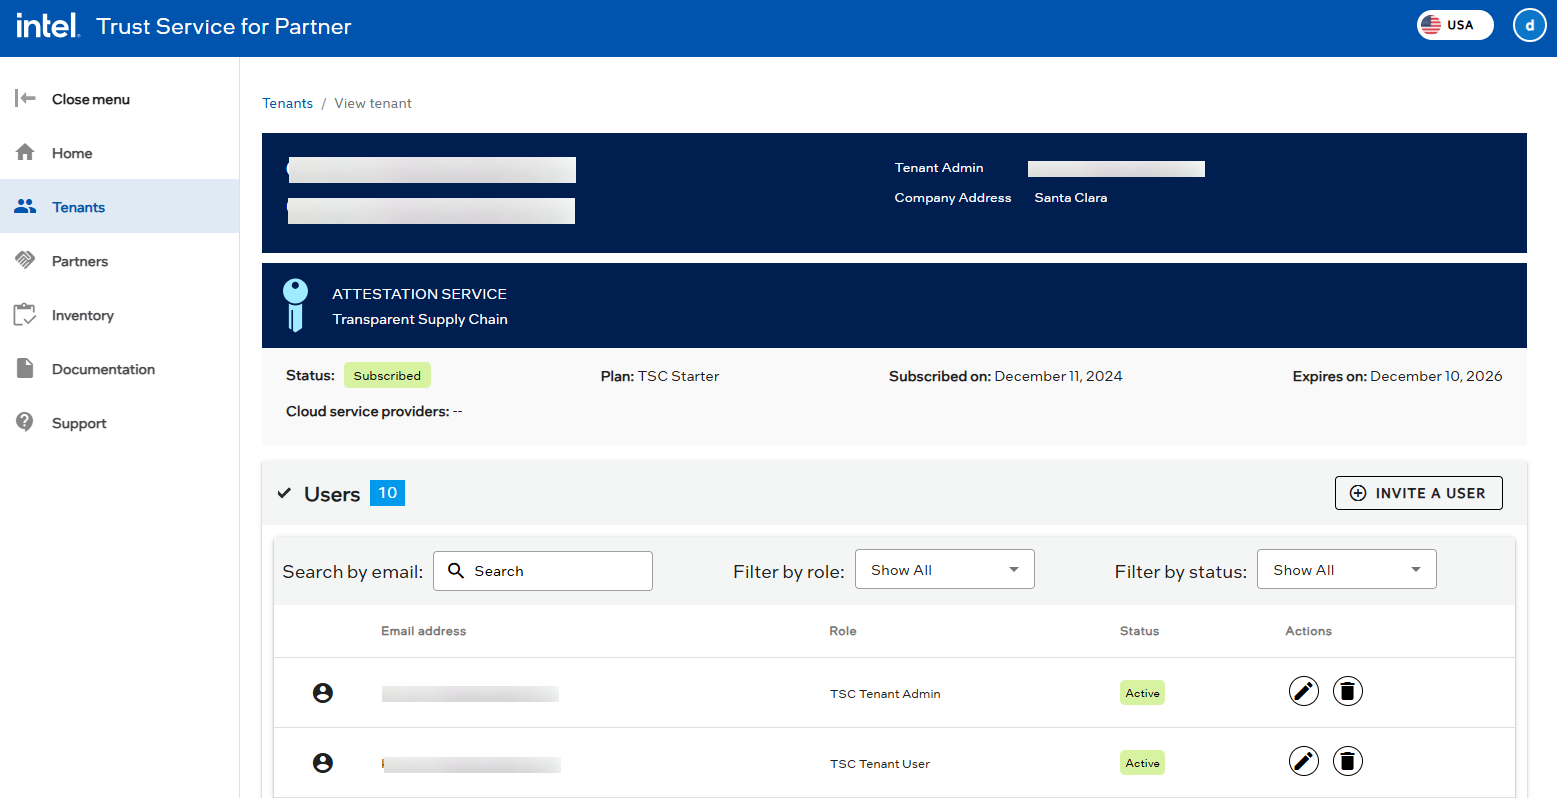
Manage tenant users
As a reseller partner admin or user, you can add, edit, or delete a tenant's users.
Select the Tenants menu item.
The Tenants page displays.
Click on the desired tenant.
The View tenant page displays.
The Users section displays the selected tenant's current users, which you can add, edit or delete.
Manage tenant licenses
As a partner admin or user, you can manage a tenant's licenses by allocating available licenses to the tenant, editing the quantity of allocated licenses, or deleting allocated licenses. This is allowed only during the first 7 days after the licenses are allocated to the tenant. After 7 days, the licenses become non-editable and non-deletable.
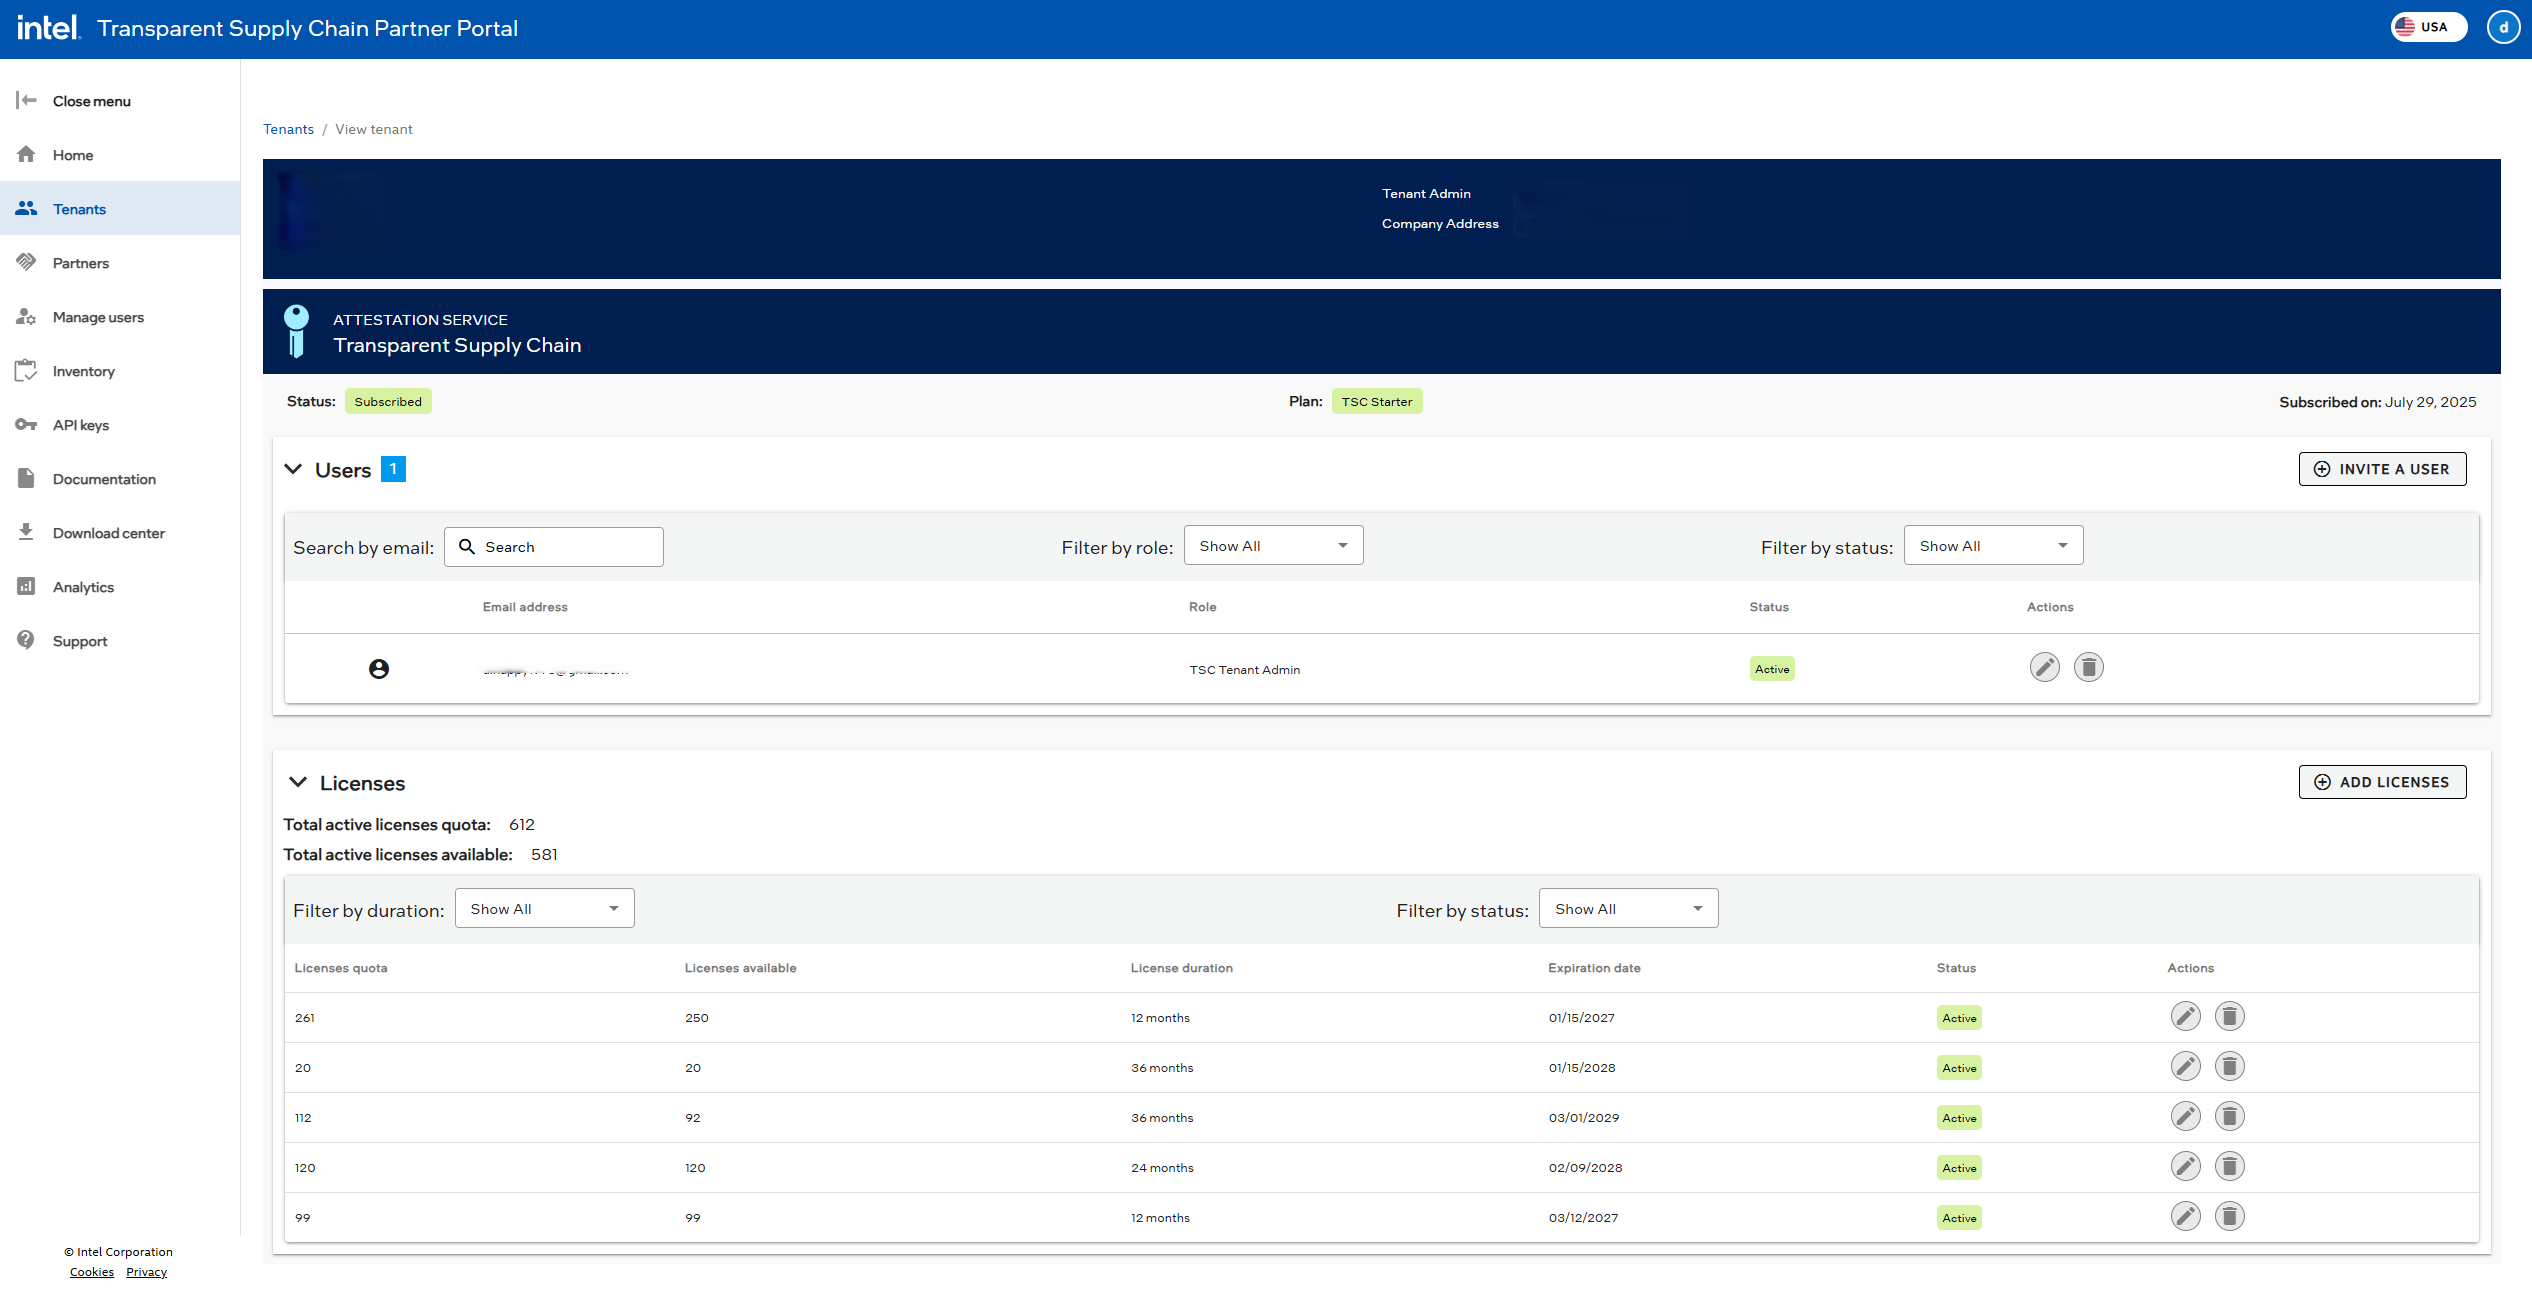
Edit tenant licenses
A partner admin or user can edit a tenant's licenses by changing the quantity of licenses allocated to the tenant. The quantity of licenses allocated to a tenant cannot exceed the number of available licenses. The allocated quantity can be reduced, but it cannot be set below the number of consumed licenses. For example, if a tenant has 10 licenses allocated and has consumed 8 of those licenses, the quantity can be reduced to 8 but not less than that.
Delete tenant licenses
A partner admin or user can delete allocated licenses by clicking the delete icon next to the license they want to delete. Deleting allocated licenses removes them from the tenant and adds them back to the available licenses pool. Once a license is consumed from the quota, the license quota allocation cannot be deleted. For example, if a tenant has 10 licenses allocated and has consumed 8 of those licenses, then the license quota allocation cannot be deleted.
Delete a tenant
A tenant can only be deleted by a partner admin. Deleting a tenant removes all tenant data and configurations.
Select the Tenants menu item.
The Tenants page displays.
Select the Edit tenant
icon of the tenant to be deleted.The Edit tenant page displays.
Select DELETE TENANT.
The Delete tenant pop-up appears.
Choose from the following:
- Select CANCEL. The Edit tenant page displays with the tenant's information.
- Select DELETE TENANT. The Delete tenants pop-up displays. Choose from the following:
- Select CANCEL. The Edit tenant page displays with the tenant's information.
- Enter the code in the pop-up and select DELETE TENANT. The Edit tenant page displays without the deleted tenant's information.