Search Results for

    Show / Hide Table of Contents

    User management

    Intel® Trust Authority user permissions are divided into tenant admins and users. Tenant admins can perform all regular user functions and manage other users through the Manage Users dashboard. At least one active tenant admin is required and is automatically assigned to the first Intel Trust Authority subscriber from a tenant organization. Only tenant admins can invite, edit, and delete users.

    Important

    Intel recommends enabling more than one tenant administrator account for redundancy purposes.

    Users can be managed using the Intel® Trust Authority portal, with the CLI, or by REST API.

    • Intel Trust Authority portal
    • CLI

    View tenant admins and users

    You can view the list of users using one of the following methods.

    1. Sign in as a tenant admin.

    2. Select Manage users.

      View Policies

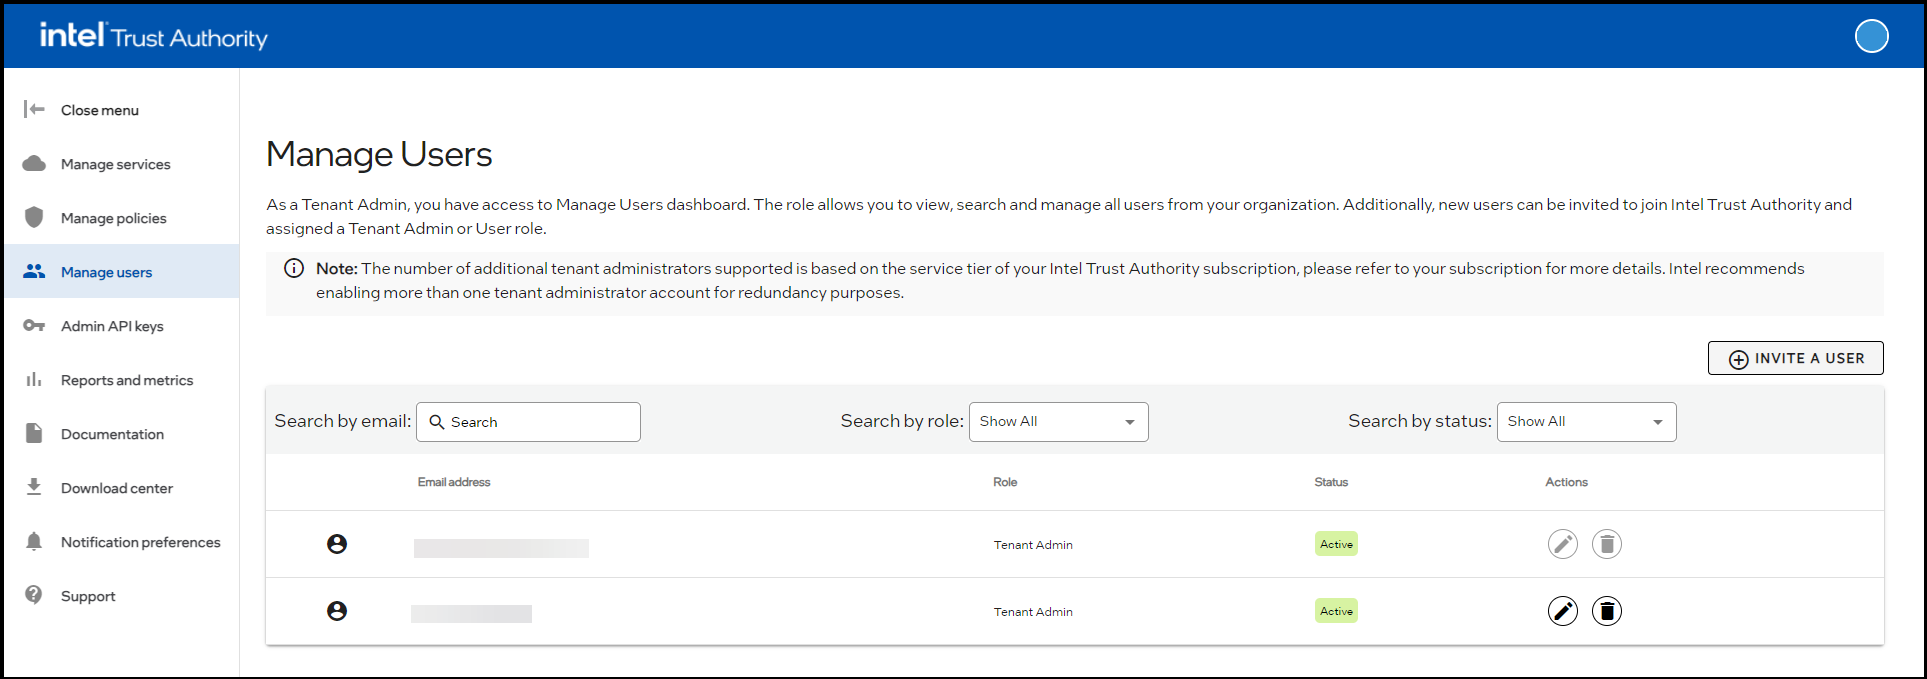
      The user, their roles, and their status are listed in the table.

    Create a user

    You can create a new user by one of the following methods.

    1. Sign in as a tenant admin.

    2. Select Manage users.

    3. Select INVITE A USER.

      View Policies

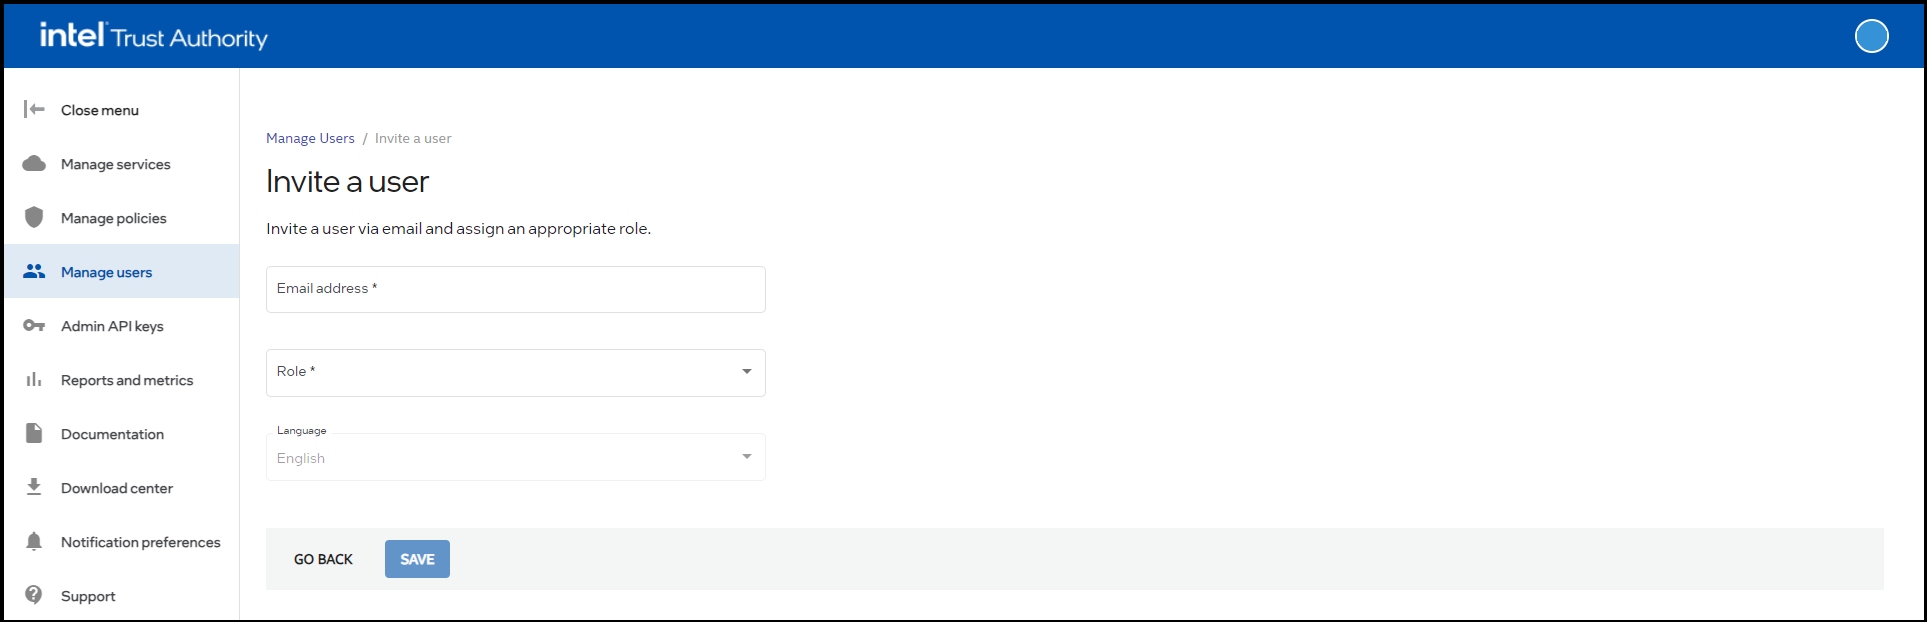
    4. Enter the user's email.

    5. Select the role for the new user.

    6. Optionally select a language for the user.

    7. Select SAVE.

      The invitation is emailed to the user.

    Search for users

    You can search for Intel Trust Authority users within your tenant by filtering users by email, role, or status. Do the following to search for users in the Intel Trust Authority portal.

    1. Sign in as a tenant admin.

    2. Select Manage users.

    3. In the Manage users dashboard, users can be viewed based on the following categories.

      • Search by email: In the Search by email: box, enter the user's email. This is an incremental search. The search starts when the first letter is entered. The users with email addresses matching the search results are displayed in the table.
      • Search by role: Select the role option (Select All, Tenant Admin, User) from the menu. The users matching the selected role are displayed in the table.
      • Search by status: Select the status option (Show All, Active, Pending) from the menu. The users matching the selected option are displayed in the table.

    Update user roles

    1. Sign in as a tenant admin.

    2. Select Manage users.

    3. Identify the user to update.

    4. Select the Edit Edit icon icon.

    5. Select YES, EDITon the pop-up.

    6. Select the updated role from the menu.

    7. Select SAVE.

    8. The user is updated, and the updated user info is displayed in the Active Users pane.

    Delete a user

    1. Sign in as a tenant admin.

    2. Select Manage Users.

    3. Identify the user to delete.

    4. Select the Delete Delete icon.

    5. Select YES, DELETE USER on the pop-up.

    6. The user is deleted, and the deleted user is removed from the Active Users pane.

    Note

    A user's policy, tags, and API keys are not deleted when the user is deleted.

    View tenant admins and users

    This command lists the current users in your environment.

    trustauthorityctl list user

    Sample call

    trustauthorityctl list user
    

    Sample response

    trace-id:  LOnetHW6IAMEEQQ=
    Users: [ { "id": "e3968eb8-e053-4646-98dd-7b61991a66d1", "email": user1@intel.com, "tenant_roles": [ { "tenant_id": "020f1162-25ed-441c-9d8f-69cfc7974cc1", "roles": [ { "id": "66ec2e33-8cd3-42b1-8963-c7765205446e", "name": "Tenant Admin" } ] } ], "active": true, "created_at": "2022-09-29T16:42:46.236499Z" }, { "id": "f9af3e31-9fc5-48db-afc3-c818049f6570", "email": user1@intel.com, "tenant_roles": [ { "tenant_id": "020f1162-25ed-441c-9d8f-69cfc7974cc1", "roles": [ { "id": "66ec2e33-8cd3-42b1-8963-c7765205446e", "name": "Tenant Admin" } ] } ], "active": false, "created_at": "2022-10-01T01:00:53.924856Z" }, { "id": "82ac5d98-c8ba-49cf-ac3e-4d4a1385be68", "email": user1@intel.com, "tenant_roles": [ { "tenant_id": "020f1162-25ed-441c-9d8f-69cfc7974cc1", "roles": [ { "id": "885391bf-2a37-4dc7-9444-833c5a817cdf", "name": "User" } ] } ], "active": false, "created_at": "2022-10-01T01:27:44.145412Z" }, { "id": "42850600-7a58-43a1-970a-85bb4008cd88", "email": user1@intel.com, "tenant_roles": [ { "tenant_id": "020f1162-25ed-441c-9d8f-69cfc7974cc1", "roles": [ { "id": "66ec2e33-8cd3-42b1-8963-c7765205446e", "name": "Tenant Admin" } ] } ], "active": false, "created_at": "2022-10-11T20:30:40.348744Z" }, { "id": "1c83eeb3-e9f7-4a59-8104-7009f6f385b0", "email": user1@intel.com, "tenant_roles": [ { "tenant_id": "020f1162-25ed-441c-9d8f-69cfc7974cc1", "roles": [ { "id": "66ec2e33-8cd3-42b1-8963-c7765205446e", "name": "Tenant Admin" } ] } ], "active": false, "created_at": "2022-10-11T21:16:45.358066Z" }, { "id": "598db1fc-4340-4bbc-9e19-2d596c3b7bd8", "email": user1@intel.com, "tenant_roles": [ { "tenant_id": "020f1162-25ed-441c-9d8f-69cfc7974cc1", "roles": [ { "id": "885391bf-2a37-4dc7-9444-833c5a817cdf", "name": "User" } ] } ], "active": false, "created_at": "2022-10-12T03:18:17.545383Z" }, { "id": "dd4b49c7-9207-43e4-a3c1-8c734cf828a4", "email": user1@intel.com, "tenant_roles": [ { "tenant_id": "020f1162-25ed-441c-9d8f-69cfc7974cc1", "roles": [ { "id": "66ec2e33-8cd3-42b1-8963-c7765205446e", "name": "Tenant Admin" } ] } ], "active": false, "created_at": "2022-10-12T03:18:19.458591Z" } ]
    

    Create a user

    Use the following command to create a new user for your environment.

    trustauthorityctl create user -e < email Id> -r < Role (Tenant Admin/User) >

    Sample call

    trustauthorityctl create user -e regularuser0@gmail.com -r User
    **Sample response**
    
    ```bash
    trace-id:  LOnduFR-IAMEVqw=
    User: 
    
     {
      "id": "8f96ee5c-69a7-497d-9cf7-900ed2250470",
      "email": "regularuser0@gmail.com",
      "role": {
        "id": "885391bf-2a37-4dc7-9444-833c5a817cdf",
        "name": "User"
      },
      "active": false,
      "created_at": "2023-09-14T04:02:57.329824144Z",
      "privacy_acknowledgement": false
    }
    

    Update user roles

    Use the following command to Update the role of a specified user.

    trustauthorityctl update user role -u < user id > -r < Role (Tenant Admin/User) >

    Sample call

    trustauthorityctl update user role -a 7110194b-a703-4657-9d7f-3e02b62f2ed8 -u "4324598fs-0404-4f4r-9oii9-8f8flk893w21" -r "Tenant Admin"
    

    Sample response

    trace-id:  LOnetHW6IAMEEQQ=
    Updated User: { "id": "598db1fc-4340-4bbc-9e19-2d596c3b7bd8", "email": user1@intel.com, "tenant_roles": [ { "tenant_id": "020f1162-25ed-441c-9d8f-69cfc7974cc1", "roles": [ { "id": "66ec2e33-8cd3-42b1-8963-c7765205446e", "name": "Tenant Admin" } ] } ], "active": false, "created_at": "2022-10-12T03:18:17.545383Z" }
    

    Delete a user

    Deletes the user from the logged in tenant for specified userId.

    trustauthorityctl delete user -u < user id >

    Sample call

    trustauthorityctl delete user -u "4324598fs-0404-4f4r-9oii9-8f8flk893w21"
    

    Sample Response

    trace-id:  LOnf6FS_oAMEXPw=
    user 4324598fs-0404-4f4r-9oii9-8f8flk893w21 deleted
    
    In this article
    Back to top Notice & Disclaimer